First Installation: Ghost Controls® Automatic Gate Opener
"I recently installed a new Ghost Controls® TSS1 gate opening kit by myself. Other than some minor experience with basic tools, I went in without any knowledge of how the process might go, but I ended up surprised by how easy and intuitive the process was. Here’s how the installation went:"
Pre-Installation
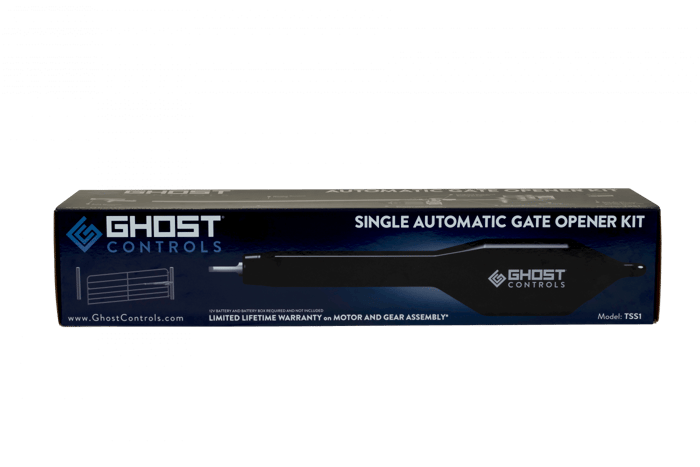
Before even unboxing the product, I could tell that Ghost Controls® packages everything they ship with exceptional quality. The graphics and labeling showed the specifications of the TSS1 and how it differs from the competition, not to mention it was nice to look at as well. Once I opened the box, I noticed that every component of the kit was packaged neatly and organized; this allowed me to separate the larger parts from items like bolts and washers, and made prioritizing pieces for different steps simple.
I expected the kit to require considerably more bolts and screws than I ended up needing, which was impressive for a device like a gate opener that can sometimes handle heavy loads. The TSS1 kit gets right to the point when it comes to an installation plan, including every part you need so there is little room for error. I even found a small flathead screwdriver included in the box with the Ghost Controls® logo on it, suited specifically for securing wiring in the control box.
The instruction manual was very dense upon first glance, but I soon realized that it included everything I would have wanted to know about the gate opener, from the actual installation method to the specifications of every part that was intended for use. I appreciated how large each page was so that the diagrams were easy to see in detail; had it been smaller, I would not have seen some of the lines that show where to insert the bolts or clevis pins.
Beginning The Installation
This kit is a single, not a dual gate opener, meaning you'll only need to learn this process for a single installation. If you are using a dual kit, the installation consists of what follows, but is simply done twice.
I recommend gathering all of the tools and parts that are needed for each step before pressing on each time. Doing this helped me to avoid taking several trips back to the box whenever the manual called for a new item.
As I began with Step 1, I started to realize just how little my lack of experience mattered when it came to assembling the first bracket and making sure it was mounted level with the wooden post and the center of my tube gate. Though I owned one, I had never used a clamp large enough to hold the bracket to the post while I inserted the bolts, but it was easy to figure out after a few seconds.
I quickly learned that tightening the nuts and washers to the back of the bolts that I was using would not work unless I secured the top of the bolt so that it didn’t rotate every time I twisted my socket wrench. Common sense to most, I know, but grabbing a pair of pliers to secure the bolt was a moment of learning for me, and from then on I felt more confident about figuring out things on my own.
I also realized at this moment that much of the assembly process could be automated using the correct drill attachment instead of simply using a handheld socket wrench, but I found this to be unnecessary because putting everything together was already too simple and quick to bother with the idea in the first place.
Once I moved the gate to its fully open position, I adjusted the position of the pivot brackets to what I guessed allowed at least four inches of clearance. After I secured the pivot brackets to their new hole, I went back with a tape measure and confirmed that I had adjusted them the correct length. Next, I marked the location of the bracket’s back holes on the post with a pencil, removed the clamp, and moved on.
Preparing To Mount The Arm
I came to the most difficult part of my installation once I started to drill holes through the points I had marked. I had never drilled holes through such a big piece of wood before, so I took extra care to work slowly so that everything would come out evenly. I started with a long 5/16” drill bit and drilled four holes through the post. Once I was done, I widened the holes enough to fit the bolts with a 13/32” drill bit.
My holes ended up being very uneven, but with a bit of supplementary drilling to adjust them, the bolts were able to fit just enough to secure the bracket to the post. I recommend using an extended socket wrench attachment to make sure you can tighten each nut far enough along its bolt to avoid having to use a regular wrench.
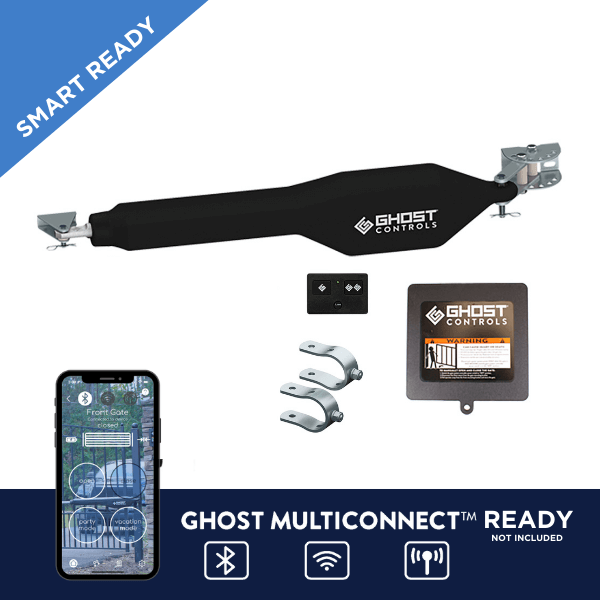
It’s worth noting that the instruction manual’s detailed diagrams helped me assemble each attachment point correctly, showing me where to fit each nylon spacer. This was especially handy for the next step, in which I mounted the remote gate opener arm to the bracket with a clevis pin.
Heavy Duty Single Automatic Gate Opener Kit - TSS1
$784.00
THIS KIT REQUIRES A 12V BATTERY (NOT INCLUDED).WE RECOMMEND A 12V DEEP CYCLE BATTERY FOR SOLAR KITS USING THE GHOST MULTICONNECT® KIT Heavy-Duty Gate Automation for Single GatesControl access to your property with the TSS1 single arm gate opener, designed… read more
Installing and Testing The Control Box
After mounting the gate opening arm to the bracket, it was time to test the system to see if it was working as intended. To mount the control box I used a 7/32” drill bit to pre-drill holes into the back of the box. There were several raised circles inside that guided me to where I should drill through.
I also found that since I was mounting my control box to a wooden post that is more narrow than the width of the box itself, I only need to drill two holes in the top and bottom middle of the box. I thought this might have been a problem, but once I drilled the screws into the back, it was tightened enough to the post that I didn’t need to worry.
Fitting the battery harness, found in its own designated plastic bag, through the bottom of the box and around the board to attach to the bullet connectors was easy once I figured out the use of the strain relief caps, which I untwisted to loosen the hole when inserting the cable.
The connectors were secure when I pushed hard enough to feel a click on both ends, allowing me to move on to connecting the harness to my battery on the opposite end. The wires were clearly colored to indicate which terminals were positive and negative.
After connecting red to black, I inserted the gate opening arm’s operator cable through the other hole on the bottom of the control box. I used my pliers to cinch the exposed ends of the wires enough to push through the hole, and then connected the individual ends, labeled by color, to their corresponding terminals.
The simplicity of the process was emphasized by the inclusion of the small flathead screwdriver in the kit. I used the screwdriver to tighten each strain relief nut on the four terminals, making sure that there were no exposed wires.
I was initially confused by the many buttons and lights on the control board, but the instruction manual once again included a detailed explanation of where each switch should be and what each light indicates. I turned on the system with the switch on the bottom of the control box and heard the series of beeps, then followed the manual to test that the arm is working. I found the remote transmitter and was happy to see that it was working as well.
Attaching The Arm To The Gate
Next, I had to attach the tube clamp brackets to my gate. Luckily, they were able to fit around the middle gate bar without me having to flare them wider. It was a bit tricky to hold the brackets still while I attached them to the front gate mount, but tightening the washers and hex nuts was easy with the use of my extended socket wrench.
I then opened the gate fully and quickly figured out how to attach the operator arm to the bracket using another clevis pin and nylon spacer in the same way I attached it to the first bracket.
Now that both ends of the operator arm were connected to the gate, I began inserting the bolts through the ends of the tubular clamp brackets. I used my pliers to once again secure the top of the bolt while I screwed the bottom nut in tight.
The bracket ended up moving slightly upon opening the driveway single swing gate, but it was still tight and wasn’t moving much. I also noticed that tightening the clamps any more would begin to deform the gate bar, so I preferred not to adjust it any further.
Final Programming and Thoughts
Programming the electric driveway gate was incredibly simple. I followed the manual’s directions and held the “JOG CLOSE” button to move the gate to my desired position, using the “JOG OPEN” button as needed to fine-tune the position.
After holding the “1st SET” button until I heard a beep, I used my remote transmitter to open the gate with the push of a button, and after hearing one final beep, I knew the gate functioned perfectly. The open and close time of the system is often around 5-10 seconds long.
My experience of installing this gate operator kit was made simple by the detailed instruction manual. I felt that I saved a great deal of time by using such an organized and coherent set of steps.
Although some of the more intensive parts (drilling through the post) didn’t come out perfectly, I realized that the margin of error for the system to function as intended allowed me to make these minor mistakes without having to worry. I am incredibly satisfied with how the installation came out, and my TSS1 gate opening system will no doubt work the way I want it to for a long time.
If you would like to access the instruction manual for the TSS1 or any other Ghost Controls® automatic gate opener kit, follow this link to a catalog of every one of our products' manuals and specifications.
Looking to learn more about Ghost Controls® solar gate openers and gate opener accessories?
Ghost Controls offers a wide array of reliable driveway swing gate openers, including chain link gate openers. For years, customers have asked for an alternative for slow, unreliable, and noisy operators. At Ghost Controls we have worked hard with innovations in Noise Reduction, Speed, and Reliability on our heavy duty electric gate openers. Additionally, we provide all of our customers with the opportunity to share our love of solar powered renewable energy by converting their systems into a solar automatic gate opener. Using a solar operator is a great way to go off the grid and provide your swing gate operator system with endless clean energy for your remote gate opener.
Speed, and Reliability:
- Quiet – motor noise is accurately correlated to quality in the mechanical and electronic design. All our openers have a maintenance free gear box and motor. They were designed for smooth, quiet operation regardless of the age and cycles of the battery powered gate opener.
- Fast – Our mechanical design and new radio frequency offer superior range offering a greater level of convenience for customers.
- Invincible (Limited Life-Time Warranty) – The motor is one of the most critical components to ensure reliability and longevity. We back our proprietary gear motors with a limited lifetime warranty. No other product in the market can make this claim.
GHOST CONTROLS® single and double swing gate openers are designed and manufactured with pride, delivering the highest quality product and customer support in the industry. We believe in our products with our limited lifetime warranty on each solar compatible dual or single gate opener*. Our corporate philosophy is; steadfast commitment to our customers, culture, products, and people.
*Limited lifetime warranty on motor and gear assembly.